Aliases in Crash Magic are the solution for taking care of misspelled street names, as well as tying different street names together into one so that all crashes show up in a single query.
Street aliases allow a street name to be associated with another name. This can be used in cases where a street changes names through an intersection, a street has multiple names, or in cases where a misspelled name has been entered.
One example is if a street named "Broadway" is also referred to as "Hwy 36". Setting up an alias will link the two streets together so that a study of an intersection of "Broadway & Main St" would also retrieve the crash records for "Hwy 36 & Main St". Another example is if "Broadway" has been misspelled to "Badway". The misspelled street can be aliased to the correct one, so that when doing a query, all the crashes on "Broadway" as well as "Badway" will be gathered.
*It is important to note that High Crash Location lists use favorite names to display the list of intersections.
For more information on aliases see Street Name Aliases.
Adding a street alias requires the group administrator privilege.
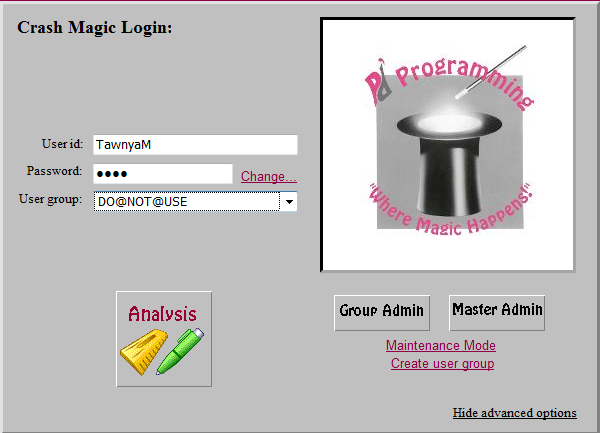
1.Login to the Admin side of Crash Magic by typing in your User id and Password and clicking on the Group Admin button on the right side. (if this button isn’t shown, click on the Advanced option shown on the bottom right).
2.You should see a page similar to this:

Admin side
3.Navigate down the tree to find your groups Street Normalizer.
oOn the left side you will see a tree with links for all your configuration attributes. There could be several groups listed here starting with a logo that looks like this  (it could be a plus or minus sign in front of the group logo).
oFind the name of your group that you logged in to, it should be something like US@Cityname (State abbrev with the name of the city or county jurisdiction). (Please Note: if you are in a state with a common configuration such as AZ, CA, CO, CT, IA, OR, etc. you will find the streets normalizer in the primary group – above your US@CityName group. It will look like a state name group starting with an underscore (_CA@xxxx). PLEASE CONTACT US IF THERE’S ANY QUESTION ABOUT THIS.
oOnce found, open it (US@CityName) to show the configuration attributes by clicking on the plus sign next to it. (If the group has a minus sign next to it, the attributes are already being shown).
oNext, open the .config attribute by doing the same as above – by choosing the plus sign for the .config attribute listed.
oIf necessary, open the the plus sign next to Normalizer – Streets. It should look something like this:
o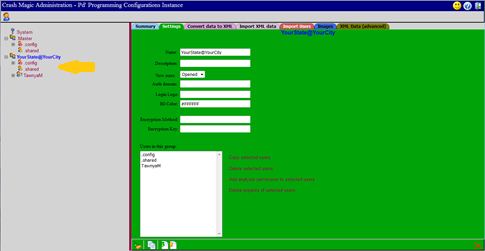
4.Then click on the Default under the Normalizer - Streets option, you will see this screen. If necessary choose the Dependent data tab at the top.
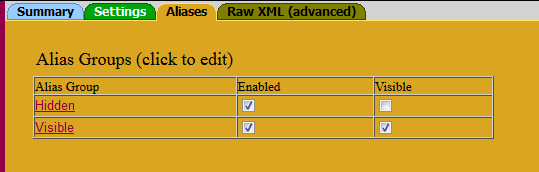
5.Click on the Hidden alias group. The top of this page will tell you the number of aliases that are in the "Hidden" group. If you have previously setup aliases, you can see them or search for them by typing in at least 2 characters to search for in the search box. For example, if you type in "MA", all the "Mains" will be listed after clicking on the Display button.

6.To add a new alias (or misspelled street), click on the Add alias link at the top of the page, or the Add button on the bottom of the screen. You'll be presented with this streets picker.
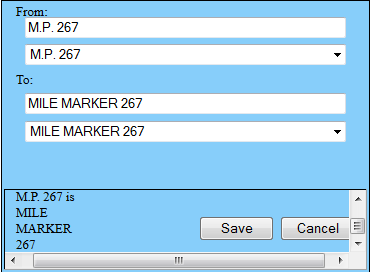
7.In the From option type the misspelled street name stored in the database, or the street name you wish to alias to another one, and select it from the list. Then in the To option, select what you want the "From" street to be aliased to, either a good spelling or the aliased name you wish to see for a street while running Crash Magic. Then Save it.
8.Continue to add aliases as needed. When finished, click on the Done button on the lower right side.
9.Then exit the Admin side by clicking the logout button in the upper right corner. 
Deleting aliases:
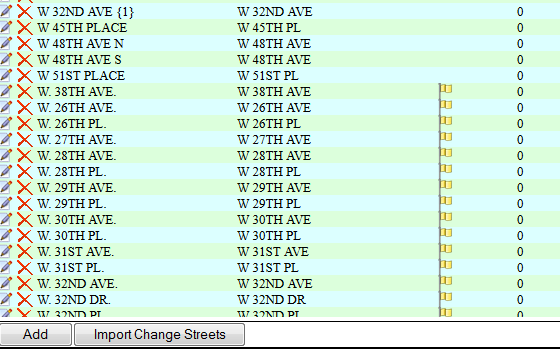
To delete an alias from the list, just click the red ![]() option next to the listing you want to delete at the aliases listing.
option next to the listing you want to delete at the aliases listing.
Extra aliases:
If you have a ![]() next to a listing, that’s an indicator that the “From” street is not in the database. This is not necessarily an error, and is harmless to leave in the system. If that From street is ever added to the database, this alias will take effect automatically.
next to a listing, that’s an indicator that the “From” street is not in the database. This is not necessarily an error, and is harmless to leave in the system. If that From street is ever added to the database, this alias will take effect automatically.