In order to run an ISAPI application in IIS, the following steps must be taken.
1.Launch Server Manager, and select "Add roles and features"
2.Click "Next" on the "Before you begin" page.
3.Select "Role-based or feature-based installation" on the "Select installation type" page, and click "Next".
4.On the "Select destination server" page, choose "Select a server from the server pool" and be sure the proper server is selected in the list. Click "Next".
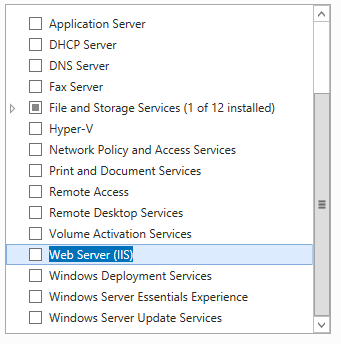
5.On the "Select server roles" page, check the "Web Server (IIS)" role. Select "Add Features" to have the appropriate features added. Select "Next".
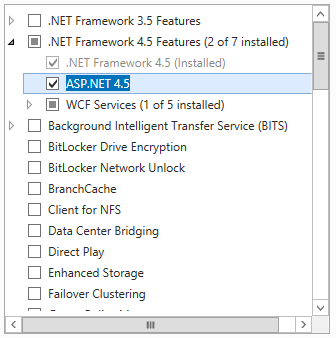
6.On the "Select features" page, select .NET Framework 4.5 Features / ASP.NET 4.5 (or latest) and press Next.
7.On the "Web Server Role (IIS)" page, select "Next".
8.On the "Select role services" page, in addition to the defaults, select the following options:
|
|
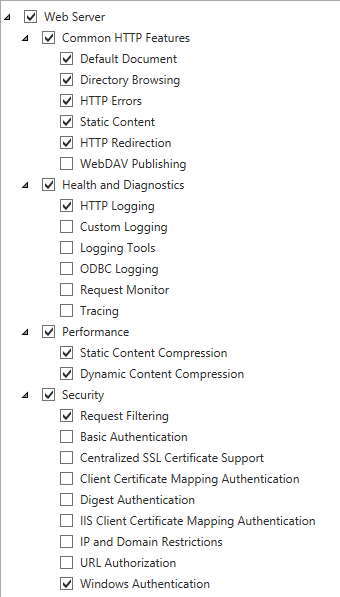
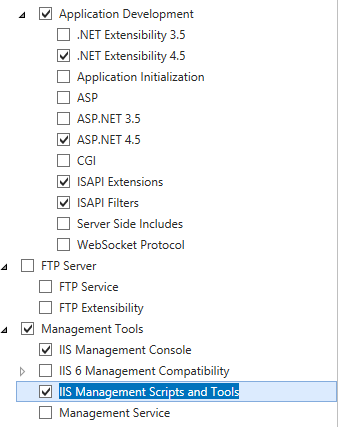
a."Common HTTP Features / HTTP Redirection"
b."Performance / Dynamic Content Compression"
c."Security / Windows Authentication" (optional - used for AD integration)
d."Application Development / ASP.NET 4.5" (and its required features)
e."Application Development / ISAPI Extensions"
f."Application Development / ISAPI Filters"
g."Management Tools / IIS Management Scripts and Tools"
9.Click "Install" on the "Confirm installation selections" page.
10.Reboot when the process is complete.