Crash Magic requires a database connection to store internal system data. These instructions show how to create the database tables. Please ensure that all required database drivers have been installed.
Be sure to review the Crash Magic requirements: https://www.pdmagic.com/kb/CurrentCrashMagicRequirements
Before beginning, the database administrator should create a login to the database and schema/catalog where the Crash Magic system tables will be stored.
Access the Crash Magic Maintenance Form
1.Open Crash Magic in your browser. Select the "Advanced" link and then the "Maintenance Mode" link.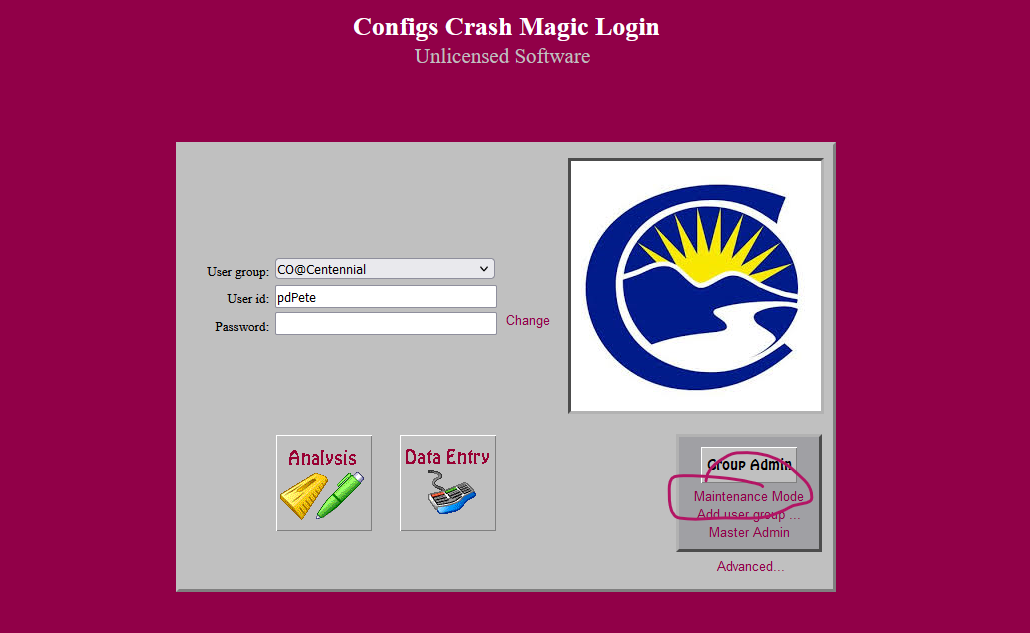
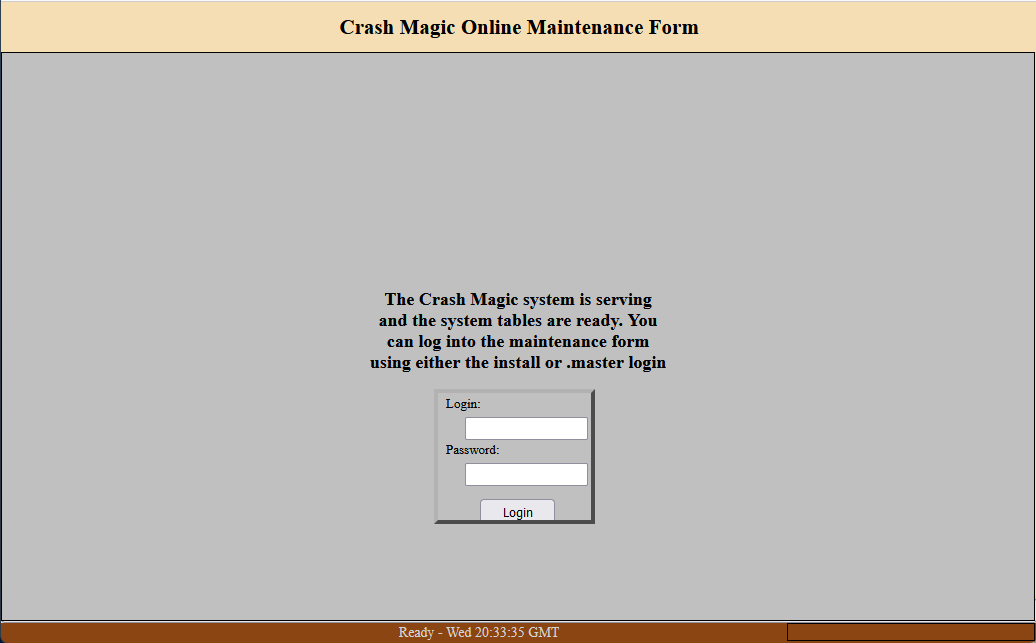
2.On the login page, enter the install admin login and password created during the initial installation process and click the Login button.
3.Click on the Settings tab of the Crash Magic Online Maintenance Form
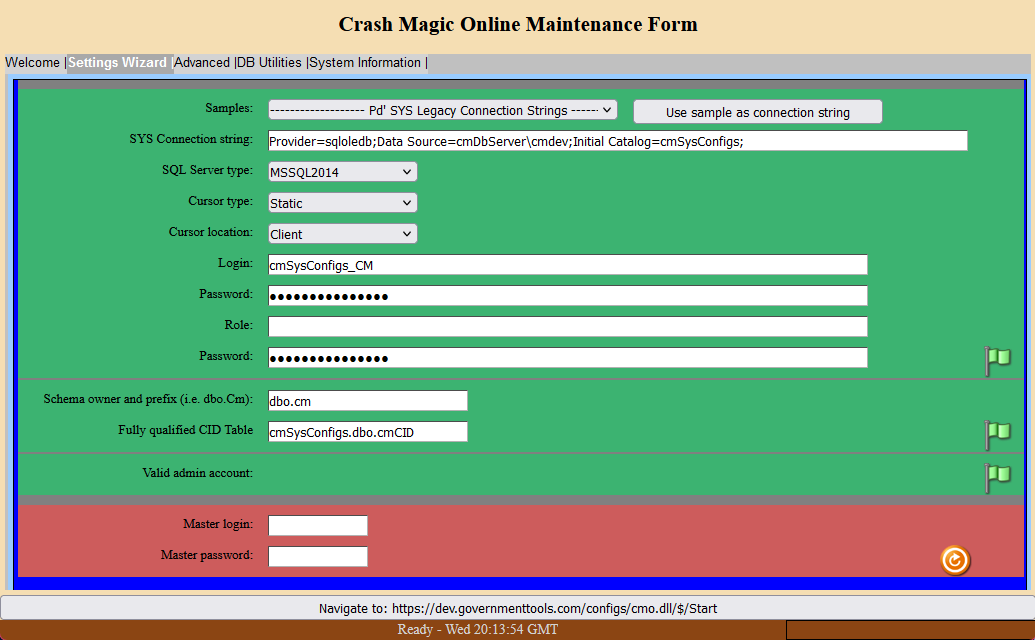
Create a connection string to the Crash Magic system tables location
1.Click on the Samples drop down menu under the configuration tab and select the database type that will be used(Pd Programming recommends selecting one of the Pd' Default connection strings samples at the bottom of the list for your type of database)
2.Click the Use sample as connection string button to populate the SYS Connection string box
![]()
3.Change the connection string parameters to access your database(In most cases this will mean changing the Data Source=(Enter the name of your data source) and if required the Initial Catalog=(Enter the name of the catalog)
Examples
Oracle
Sample connection string provided:
Provider=OraOLEDB.Oracle;Data Source=MyOracleDB;
MyOracleDB should be changed to the data source specified in the Oracle tns names file. In the example below the CrashMagic is the specified database alias in the Oracle tns names file.
Provider=OraOLEDB.Oracle;Data Source=CrashMagic;
MS SQL Server
Sample connection string provided:
Provider=sqloledb;Data Source=myServerAddress;Initial Catalog=myDataBase;
myServerAddress would be changed to the name of the server hosting the database, and myDatabase would be changed to the name of the database used on the server. In the example below SQLDbServer is the name of the host and CrashMagic is the database on the server.
Provider=sqloledb;Data Source=SQLDbServer;Initial Catalog=CrashMagic;
DB2
Sample connection string provided
Provider=IBMDADB2;Database=myDataBase;Hostname=myServerAddress;Protocol=TCPIP; Port=50000;
myDatabase is the name of the DB2 database and Hostname is the name of the server where the database resides. In the example below CrashM is the database name and DB2Server is the name if the server where CrashM resides.
Provider=IBMDADB2;Database=CrashM;Hostname=DB2Server;Protocol=TCPIP; Port=50000;
Enter the information that Crash Magic will use to access the system tables
1.In the SQL Server type drop down menu select the type of database that will be used
2.Enter the login name to the database that Crash Magic will use to connect to the system tables that will be used(This login must be granted select, insert, update and delete privileges for the Crash Magic system tables)
3.Enter a password for the Login in the Password text box
4.In the Role text box enter any required role that will be required to access the Crash Magic system tables(This is optional as some database environments may choose not to use roles. This should be left blank if no role is in use.)
5. Enter any password required by the role(This should be left blank if no role is in use) and press the tab key to open the next section
6.In the following text box enter the schema name and table name prefix for the Crash Magic system tables in the text box using the . separator(The recommended table prefix name is cm Example dbo.cm where dbo is the name of the schema that the tables will reside, and the Crash Magic system tables will all start with cm in their names)
7.Press the tab key to move to the next section
Create the Crash Magic system Tables
1.Click the Create tables button
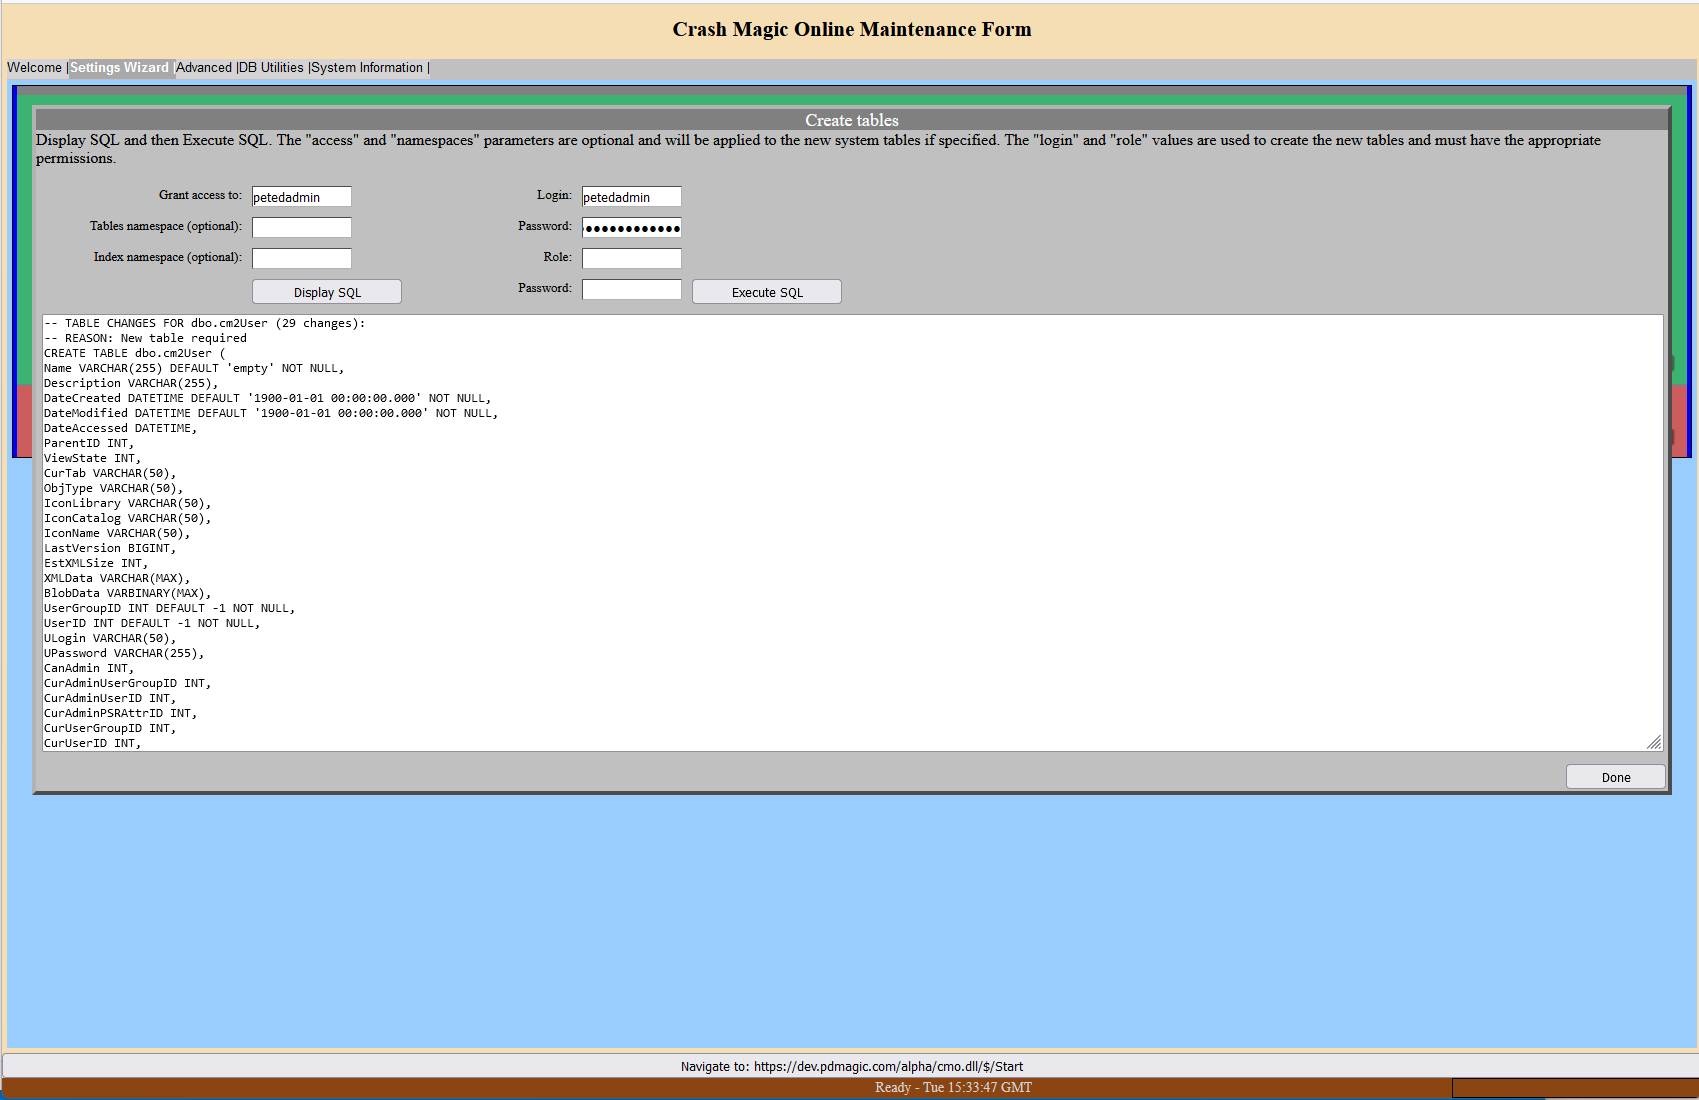
2.Ensure that the Grant access to box contains the user login name that Crash Magic will use to access the system tables.
3.In the Tables namespace box enter a table space name where the tables will be stored(This box should be left blank to use the default table space for the database)
4.In the Index namespace enter the table space name where the indexes for the system tables will be stored(This box should be left blank to use the default table space for the database)
5.In the Login text box enter a login name for a user that has the privilege to create tables
6.In the Password text box enter a password the login on the previous step
7.If required enter a role name in the Role text box(This should be left blank if the login requires no role to create tables)
8.If required enter a password for the role in the Password text box(If no role is used this box should be left blank)
9.Click the Display SQL button to render the script that will create the system tables and review the SQL
10.Click the Execute SQL button to create the system tables
11.Click the OK button when the SQL is done executing
12.Click the Done button to close the window
13.Click the Welcome tab of the Crash Magic Online Maintenance Form to save your changes and close the browser window.