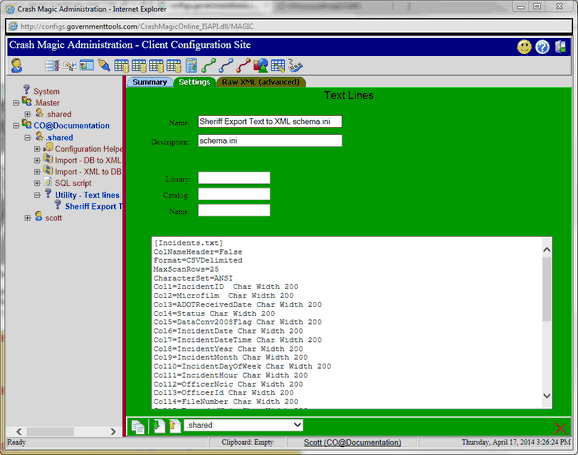
Crash Magic was designed to be able to import xml files. Clients that will be using the import feature of Crash Magic will need to convert the data data being imported into an xml file format. Importing data from a text source may require that a user create a schema.ini file to define the file being imported. The ini file is created in the process of setting up a Windows data source. The ini file must be in the same directory as the text file the is being imported to work. The following steps show how to create a schema.ini for a text file with comma separated columns and column headers for each column on a windows 7 machine.
Open your ODBC data source administrator
1.Click on the windows (start) button and select the Control Panel.
2.If in Category View then click on System and Security.
3.Click on Administrative Tools.
4.Click on Data Sources (ODBC) to open the ODBC Data Source Administrator window.
Locate the directory of the file
1.With the User DSN tab selected on the ODBC Data Source Administrator window open click the Add button.
2.Select the Microsoft access Text Driver(*.txt, *.csv)
3.Click the Finish button to open the ODBC Text setup window.
Select a directory where the text file exists
1.With the ODBC Text setup window still open, uncheck the Use Current Directory.
2.Click the Select Directory... button.
3.Browse to the file that you would like to create a schema.ini file for.
Select text extension for importing schema.ini will be created for
1.With the ODBC Text setup window still open select the *.txt from the Extensions List.
Define a format for the file
1.With the ODBC Text setup window still open click the Define Format.. button
2.In the Define Text Format window select your text file.
3.Click the Column Name Header check box.
4.Select the format of the text file.
5.Click the Guess button to populate the Columns.
6.Click the Ok button when done to create the file.
7.Click the Cancel button on previous windows as only the ini file is needed.
The following steps created a schema.ini file in the directory with your text file. Once the file is created it will need to be added to the Crash Magic configuration.
Create the Utility - Text lines PSRattr
1.Log into Crash Magic as the Group Administrator.
2.Click on the .shared user under the user group you have logged into.
3.Select the green Settings tab.
4.Click on the drop down menu in the Utility functions box and select Utility - Text lines (textlines).
5.Click the Create new PSRattr button.
Add the schema.ini information:
1.Crash Magic should now display the green settings tab of the Utility - Text lines that was created from the previous task.
2.Change the Name box to the <data source name> Text to XML schema.ini.
3.Enter a description of schema.ini.
4.Copy the text of the schema.ini file to the large white text box.

5.Click the the blue Summary tab to save the settings.